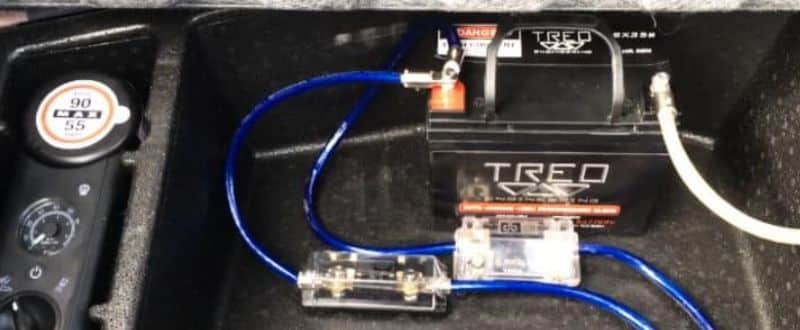
Hooking up an additional battery for car audio can seem like a technical challenge and in many ways, it is. If you’re wondering how to install a second battery for car audio, you’ll quickly find it’s more than just connecting a few wires. Choosing the right battery, understanding how to wire it, and avoiding common pitfalls aren’t always straightforward. It’s easy to feel uncertain, especially if you haven’t worked with a car’s electrical system before.
I’ve worked with enough installations to know where most people get stuck and more importantly, how to keep things safe and efficient. One of the most critical early decisions is understanding the difference between series and parallel connections. Without that foundational knowledge, it’s easy to damage components or reduce the lifespan of your batteries.
That’s why, before getting into the 11-step installation process, I’ll start by breaking down the functionality of these two connection types. This knowledge sets the groundwork for a stable and properly powered car audio system and helps prevent costly mistakes.
In This Article
- Parallel Vs. Series – Which Is Better for Car Audio?
- 11 Steps for Installing a Second Battery for Car Audio
- Step 1: Preparing the Tools
- Step 2: Selecting the Battery Location
- Step 3: Disconnecting the Primary Battery
- Step 4: Mount the Second Battery
- Step 5: Installing the Battery Isolator
- Step 6: Add Inline Fuses
- Step 7: Wire the Batteries in Parallel
- Step 8: Ground the Second Battery
- Step 9: Add Terminal Protection
- Step 10: Reconnect the Main Battery
- Step 11: Test the System
- The Outro
Parallel Vs. Series – Which Is Better for Car Audio?
When wiring a second battery for car audio, you’ll need to choose between a series or parallel connection. The difference comes down to what you need more of, voltage or capacity.
In a series connection, you link the positive terminal of one battery to the negative terminal of the other. This doubles the voltage — two 12V batteries give you 24V but the capacity (amp-hours) stays the same. So, two 50Ah batteries still give you 50Ah total.
That kind of setup isn’t ideal for car audio. Higher voltage increases resistance, which can lead to overheating. And if one battery goes bad, the whole system can fail. I’ve seen this happen often enough to know it’s not worth the risk for most car audio builds.
A parallel connection is the better option in almost every case. Here, you connect all the positives together and all the negatives together. The voltage stays the same, but the capacity adds up. Two 12V, 50Ah batteries in parallel will still give you 12V, but now with 100Ah total.
This setup gives you longer runtime and adds some backup. If one battery drops out, the other keeps things going. I use parallel wiring in audio systems because it delivers steady power without the heat and instability that can come with a series setup.
11 Steps for Installing a Second Battery for Car Audio
Now that you understand why a parallel connection is the better choice for car audio, it’s time to get hands-on. I’ve broken the process into 11 practical steps to help you install your second battery safely and without confusion. Even if this is your first time working with car wiring, you’ll be able to follow along without trouble.
Let’s start with the basics — tools.
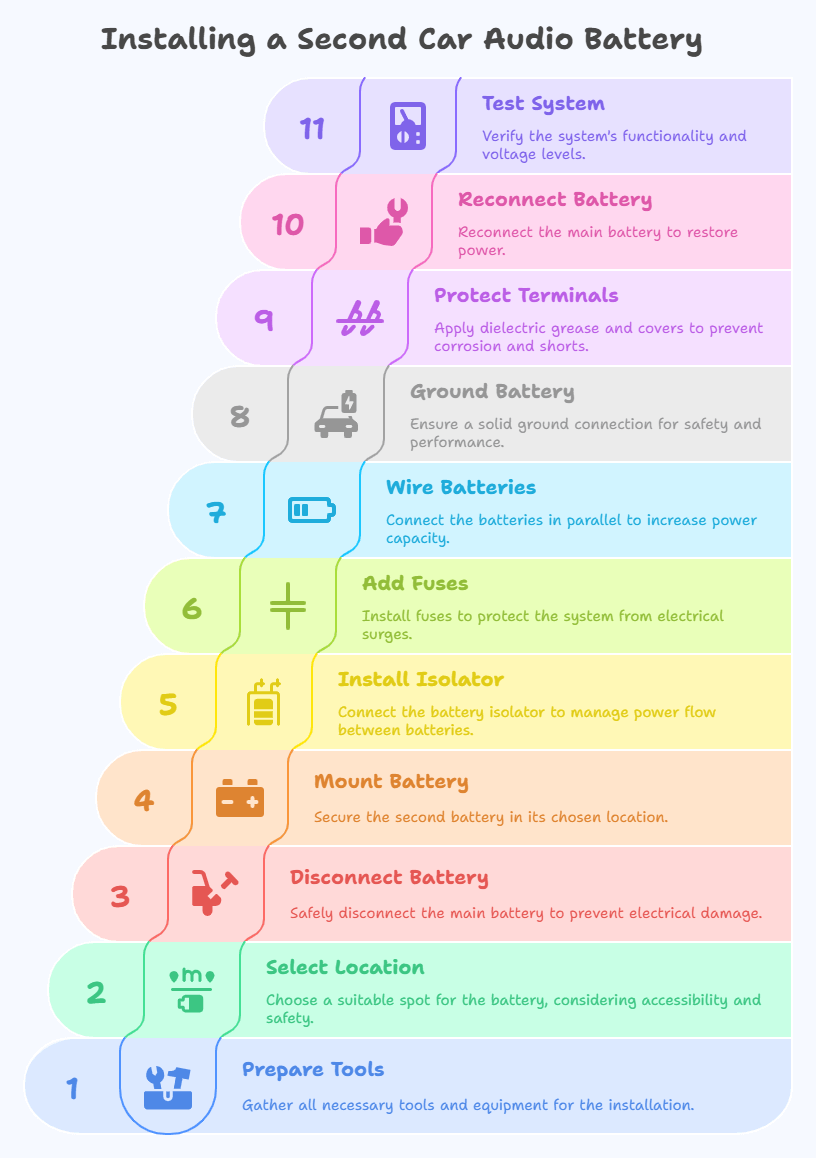
11 Steps for Installing a Second Battery for Car Audio - infographic
Step 1: Preparing the Tools
Before touching any wires, get all the equipment together. This saves time and avoids the frustration of running into missing parts midway through the job.
Here’s what you’ll need:
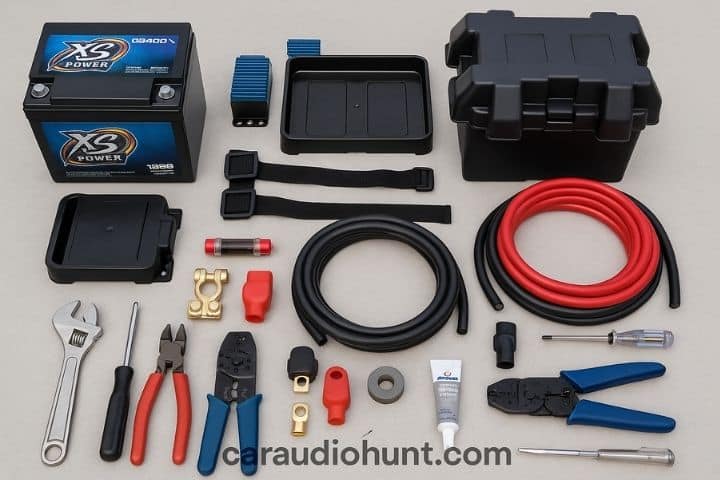
- Second Battery – Match the battery to your system’s power requirements and available space. If you're unsure what to look for, I recommend checking out my battery selection guide. You can also review my top car audio battery picks for this year.
- Battery Isolator – Keeps your main and auxiliary batteries from draining each other when the car is off.
- Battery Tray – A stable surface to secure the battery.
- Battery Box – Adds protection against weather, leaks, and physical damage.
- Battery Holder Straps – Keeps the battery from shifting while driving.
- Power Cables – Heavy-gauge insulated cables for carrying current between the battery and audio system.
- Ground Cables – Connect the battery to your vehicle’s chassis for grounding
- Fuse & Inline Fuse Holder – Critical for protecting your system against shorts or surges.
- Battery Terminals – Attach and secure your wiring to the battery posts.
- Terminal Covers – Prevent accidental contact with exposed terminals.
- Dielectric Grease – Helps prevent corrosion and extends connection life.
You’ll also want a few standard tools within reach:
- Adjustable wrench
- Screwdriver
- Wire cutter and stripper
- Crimping tool
- Voltage tester
Once everything’s ready, you’re set to move on to mounting the battery the next step in building a reliable and safe dual battery setup.
Step 2: Selecting the Battery Location
With your tools ready, the next move is to find a good spot for the second battery. You want it close to the amplifier to minimize voltage drop and cable length which is why the trunk is often the best location. It’s usually spacious, accessible, and far from engine heat.
Just be sure the mounting area is:
- Flat and stable
- Away from heat sources or sharp metal edges
- Easily accessible for maintenance
I’ve seen plenty of installs fail simply because the battery was placed where airflow was poor or where vibration caused long-term damage.
Step 3: Disconnecting the Primary Battery
Before any wiring begins, disconnect the vehicle’s main battery to avoid short circuits or electrical damage.
- Start by removing the negative terminal (usually marked with “-” or black). Use an adjustable wrench to loosen the clamp.
- As an added safety step, disconnect the alternator’s connection to the battery, especially if you're working near the engine bay or running cable through the firewall.
Taking 60 seconds to do this upfront keeps the rest of the process safer for both you and your vehicle.
Step 4: Mount the Second Battery
Secure the battery tray or box in the location you chose earlier. Once it’s fastened, place the battery inside and strap it down tight. It shouldn't move at all while driving. I always give the battery a firm shake after mounting if it budges, it’s not secure enough.
Step 5: Installing the Battery Isolator
Mount the isolator close to the alternator and main battery to keep the cable runs short.
- Connect the input side of the isolator to the positive terminal on the alternator.
- One output wire goes to the positive terminal of the main battery.
- The other goes to the positive terminal of the second battery.
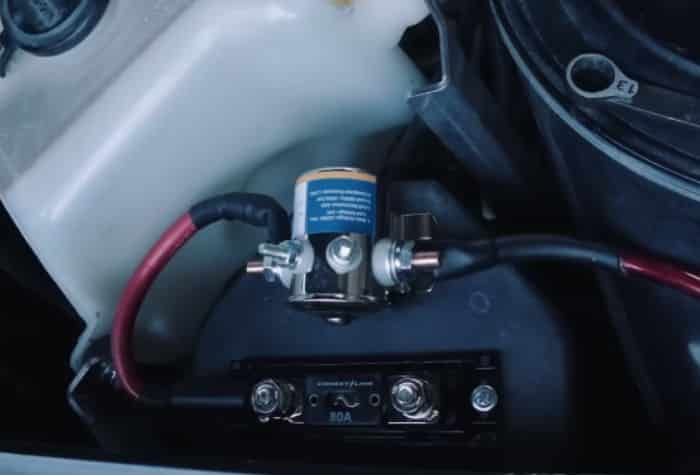
Use proper gauge power cables. A clean, short connection makes things simpler if you ever need to troubleshoot and in my experience, it holds up better over time. To get more detailed DIY guide on Battery Isolator installation, check out this guide: caraudiohunt.com/how-to-install-a-battery-isolator-for-car-audio
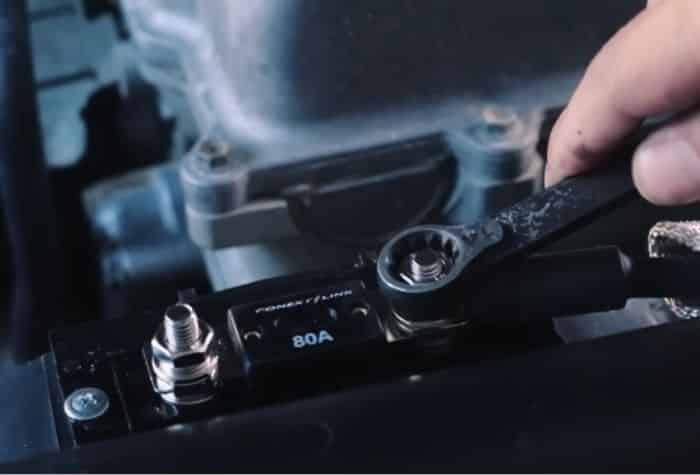
Step 6: Add Inline Fuses
Use two fuses to protect the system:
- Between the main and secondary batteries’ positive terminals
- Between the second battery and the amplifier
Each fuse should be placed as close as possible to the battery or amp it protects. Cut the power cables to length, crimp the ends, and install them into the inline fuse holders.
This isn’t just a precaution. I’ve seen amps burn out from a missing fuse. Don’t skip this.
Step 7: Wire the Batteries in Parallel
Now wire the two batteries together:
- Connect positive to positive, with a fuse in between
- Run a second power cable from the secondary battery’s positive to the amplifier
- Connect negative to negative on both batteries
This keeps the voltage at 12V but gives you more available power. It’s the setup I use on all car audio installs.
Step 8: Ground the Second Battery
Run a ground cable from the negative terminal of the second battery to a clean, unpainted spot on the chassis. A solid ground is just as important as the power wiring. I always sand down the contact point to bare metal as poor grounding causes problems.
Step 9: Add Terminal Protection
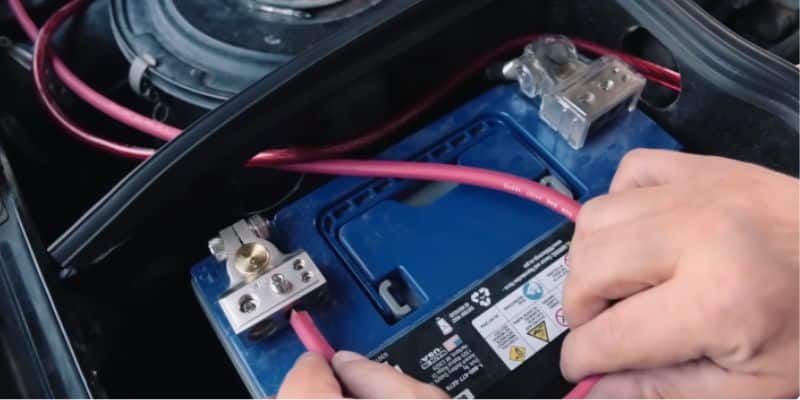
Apply dielectric grease to all terminals to prevent corrosion. Then install terminal covers to protect against short circuits. These two quick steps help the system last longer and stay safer.
Step 10: Reconnect the Main Battery
Reconnect the negative terminal on the main battery to power everything back up.
Step 11: Test the System
Check the voltage on both batteries with a multimeter. With the car off, they should each read around 12.6 to 12.8 volts. Start the car and check again. charging voltage should read around 13.5 to 14.5 volts. If the numbers look good, the system’s ready.
At this point, I usually give all connections a final check and turn on the audio to make sure everything’s running clean.

The Outro
Upgrading your car audio system for more power can seem overwhelming at first but with the right steps, it becomes manageable. A second battery isn’t just about squeezing out more volume or runtime; it’s also about protecting your system and keeping things safe while you're on the road.
Every choice you make during the install from wiring to fuse placement affects the outcome. I’ve laid out this guide so you can move forward with confidence, knowing you’ve covered the critical details. If you’ve followed the steps carefully, your setup should now be ready to deliver clean, uninterrupted audio and powered the right way.
If this guide helped you get your second battery installed, consider exploring more:
Got a question about your setup? Drop it in the comments — I’ll do my best to help you.
