
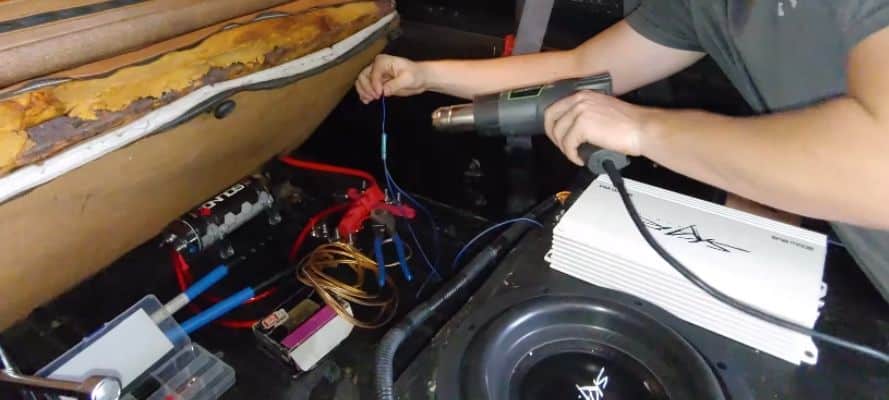
To wire a car audio capacitor with dual amps, run one fused power wire from the battery to the capacitor, connect the capacitor's positive terminal to a fused distribution block, and send a separate fused lead from the block to each amplifier. The capacitor, the block and both amps sit within about 18 inches of each other, and each one gets a short ground of the same gauge to bare chassis metal. That layout is how to wire a car audio capacitor with dual amps so both draw from one stiff supply. Size the capacitor from the two amps' combined RMS power, so a 1,000-watt mono amp plus a 300-watt 4-channel amp calls for about 1.3 Farads. If your system already runs two amplifiers, or soon will, this is the layout to follow.
The method below keeps power delivery clean, bass response firm and both amplifiers protected over the long term.
If you’re just starting out, we recommend checking out our beginner’s guide to capacitor installation before diving into this dual-amp setup.
Table of Contents
Understanding the Basics Before Wiring
Before starting the wiring process, it’s worth knowing what a capacitor does and how it interacts with multiple amplifiers. Having a good grasp of the basics helps avoid common mistakes and power-related issues later on.
What a Capacitor Does in a Car Audio System
A capacitor stores a small charge beside the amps and releases it in the milliseconds of a bass peak, so neither amplifier sees the voltage dip in the long power run.
If you're new to capacitors or want a deeper understanding, check out this guide on what a car audio capacitor does.
Can One Capacitor Serve Two Amps?
Yes, a single capacitor can be used with two amplifiers, as long as the total power draw stays within its limits. The usual rule of 1 Farad per 1,000 RMS watts applies to the two amps added together, and the full method for sizing the capacitor from combined RMS covers the edge cases. So, if you’re running a 500-watt sub amp and a 400-watt 4-channel amp, a 1 Farad capacitor is actually enough. For higher-demand systems, we suggest a slightly larger capacitor that can help maintain stable voltage more consistently.
Types of Amplifier Setups
Knowing the type of amplifier you’re using shapes your wiring layout and capacitor placement.
In a dual amp setup, one common configuration is using a mono amp for the subwoofer and a 4-channel amp for mids and highs. This setup covers the full audio range and helps deliver balanced sound throughout the vehicle. The mono amp pulls most of the current in that pairing, so it gets the shorter lead from the distribution block.
Tools and Prerequisites
Before getting into the wiring process, make sure you’ve gathered all the essential tools and materials. Missing components can delay the install or lead to unsafe connections.
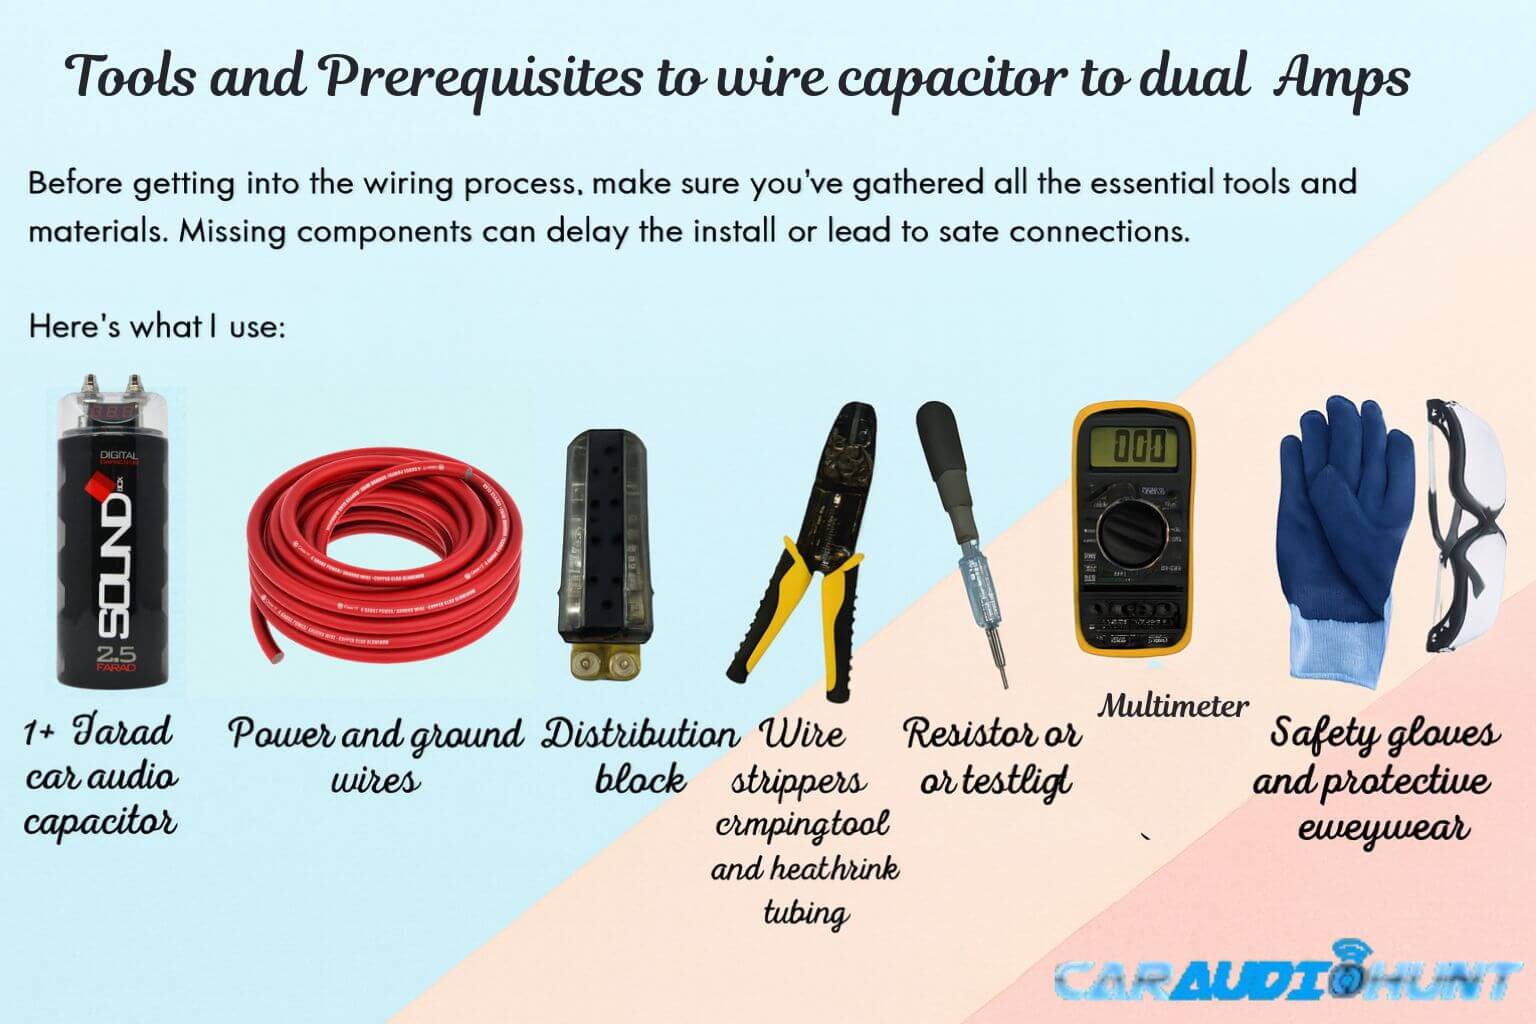
One person can wire the whole system, though a helper speeds up pulling the main power wire through the firewall grommet.
If you’re not sure which capacitor to go with, check out our review guide on the best capacitors for car audio that suit different setups.
Planning the Wiring Configuration
Laying out your system properly is as important as the components themselves. A clean, well-planned wiring setup prevents voltage drops, unwanted noise, and potential safety issues. Read as a capacitor wiring diagram for two amps, the power path runs battery, main fuse, capacitor, fused distribution block, then one lead to each amp.
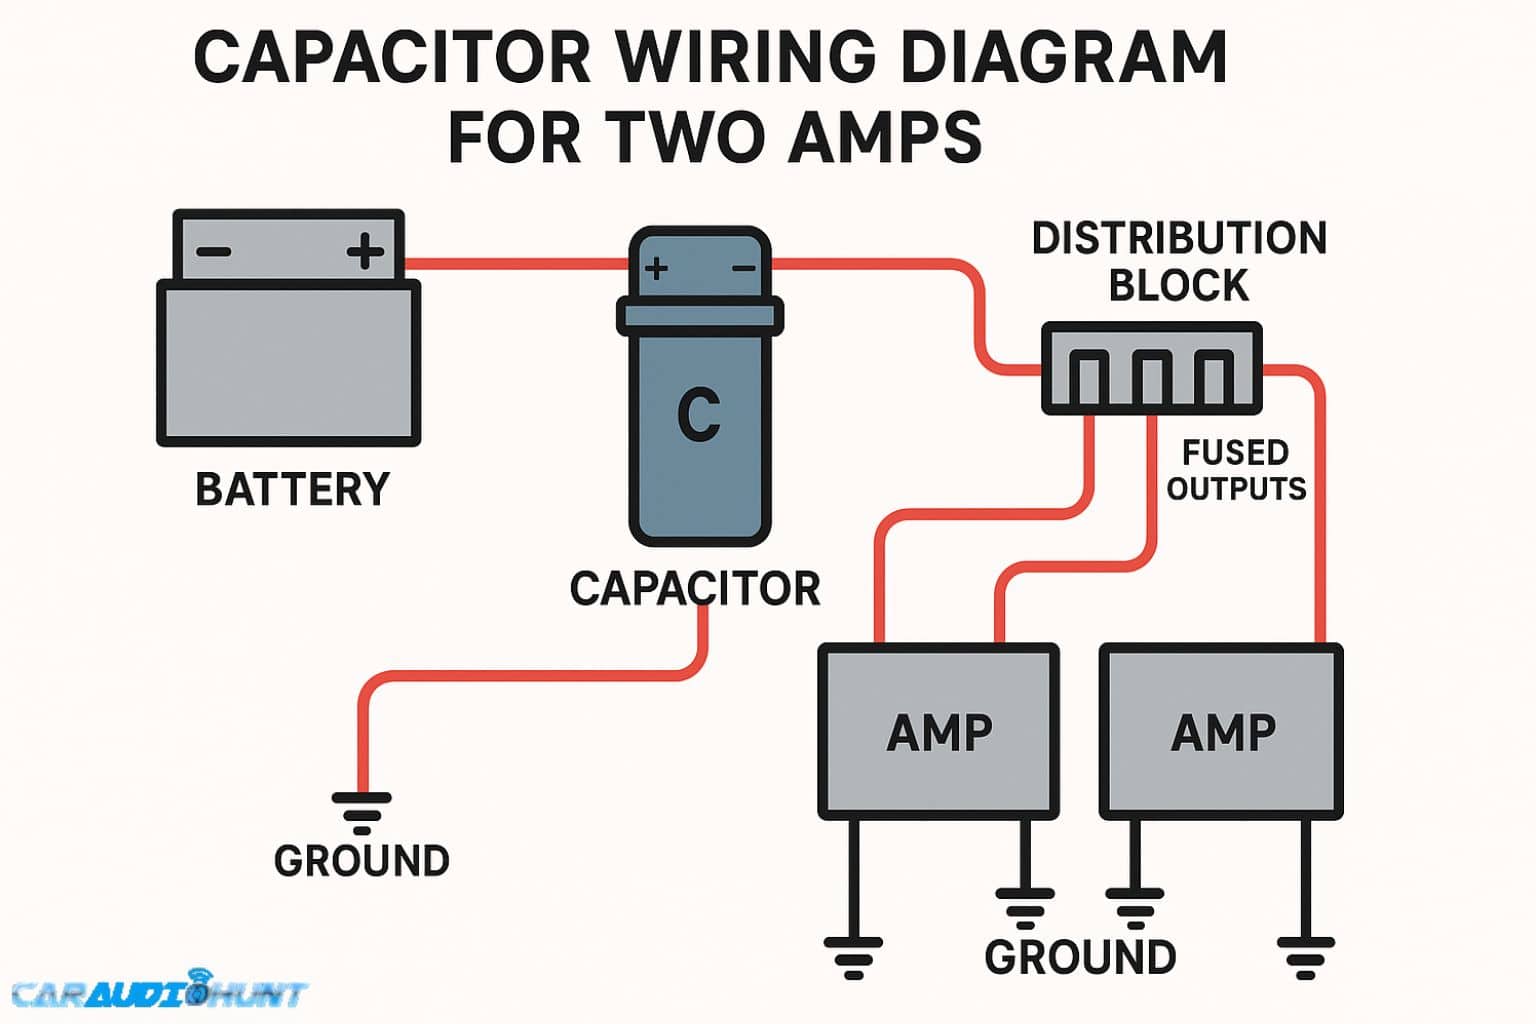
Capacitor Wiring Diagram for Two Amps
Series vs. Parallel (And Why Parallel Wins)
Power Distribution to Multiple Amps
Grounding Best Practices
Step-by-Step Car Audio Capacitor Wiring With Dual Amps
The safe order for how to wire a car audio capacitor with dual amps is to do all of the wiring with the battery disconnected and the main fuse out, and charge the capacitor only at the end, once both amps are connected.
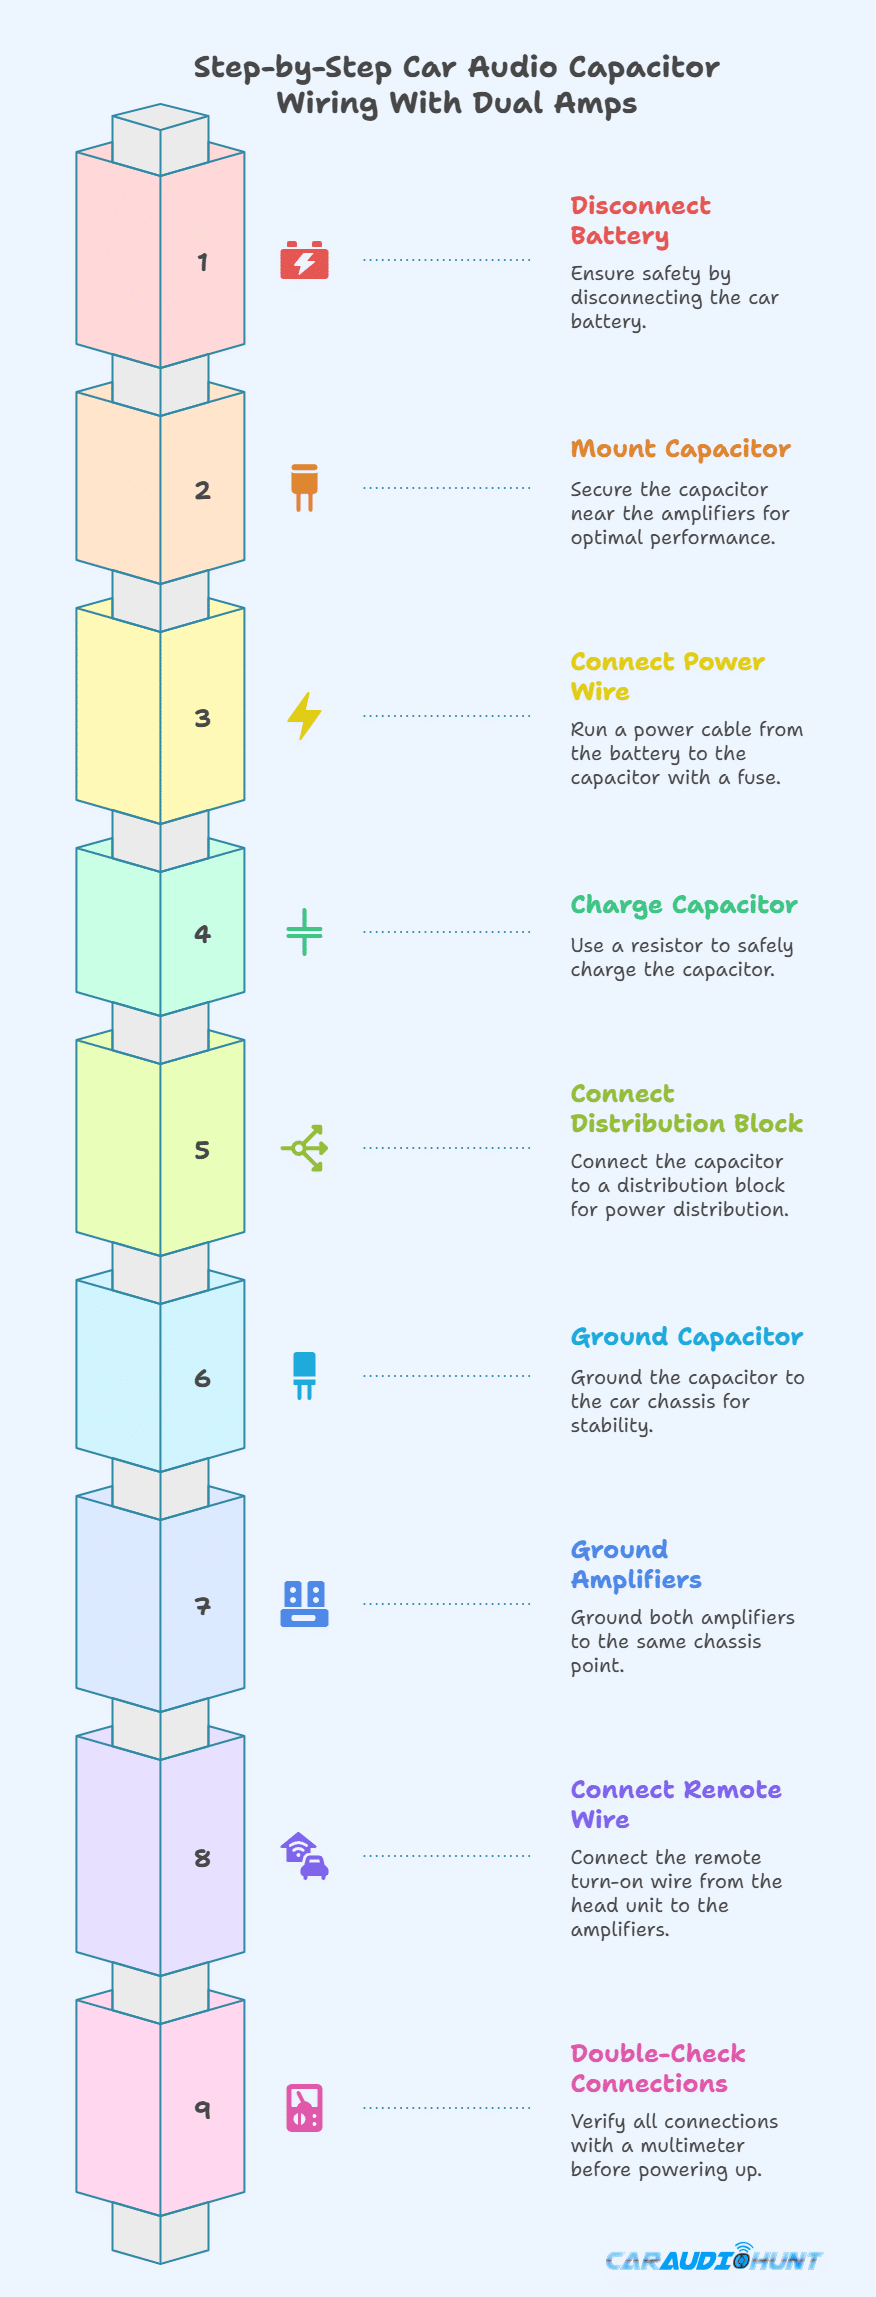
Want to share this infographic?
Copy and paste the code below into your blog or website:
Step 1: Disconnect the Battery
Start by disconnecting the negative terminal of your car battery. This prevents accidental shorts and keeps you safe while working with live wires.
Step 2: Mount the Capacitor
Secure the capacitor close to your amplifiers, ideally within 18 inches. Keeping the distance short reduces resistance and allows the capacitor to respond quickly when your system demands power. That proximity makes a real difference in power transfer during bass peaks.
Step 3: Connect the Power Wire to the Capacitor
Run a 0 AWG power cable from the battery to the capacitor’s positive terminal. Be sure to install an inline fuse no farther than 18 inches from the battery to protect the circuit, and leave the fuse out of its holder until Step 10. We recommend using high-quality fuse holders for a secure, weather-resistant connection.
Step 4: Connect the Distribution Block
After the cap is mounted, connect a short wire from its output terminal to a distribution block. Then run two separate power wires from the block to your amplifiers. Keep the wire gauge consistent from the cap to the block, since a thinner jumper there causes the very voltage drops the capacitor is meant to prevent.
Step 5: Ground the Capacitor
Use the same gauge wire as your power wire to ground the capacitor. Connect it to a clean, bare metal point on the chassis, ideally within 18 inches of the cap’s location.
Step 6: Ground the Amplifiers
Ground both amps using equal-gauge, equal-length wires. Using the same chassis point as the capacitor minimizes ground loop interference, especially in high-powered systems.
Step 7: Connect the Remote Turn-On Wire
Run the remote turn-on lead from your head unit. If needed, split the wire using a Y-connector and send one lead to each amp. This wire ensures the amps turn on only when the head unit is powered. A digital capacitor's third terminal can share the same lead, so its display shuts off with the stereo. Test this signal with a multimeter once the battery is back on, and expect about 12 volts with the stereo on.
Step 8: Double-Check All Connections
Before reconnecting the battery, go over all wiring. Use a multimeter to check for continuity. Confirm that all distribution block fuses are installed and terminals are secure. Taking a few extra minutes here saves hours of troubleshooting later.
Step 9: Reconnect the Negative Battery Terminal
Reconnect the negative terminal with the main fuse still out. The capacitor cannot charge without the battery in the circuit. With the fuse holder empty, no current reaches the capacitor until the next step.
Step 10: Charge the Capacitor and Fit the Main Fuse
Bridge the empty main fuse holder with a resistor or test light until the capacitor reads close to battery voltage, then remove it and seat the fuse. Full capacitor charging tutorial
Step 11: Check the Voltage at Both Amplifiers
With the engine running and music playing, put the multimeter across each amp's power and ground terminals. Both should read within about 0.5 volts of the battery. An amp that reads lower than the other usually has a loose ground or a weak fuse contact at the block, so recheck that amp's connections first.
Mistakes to Avoid While Adding 2 Amps to 1 capacitor
These avoidable mistakes cause most of the electrical problems and weak performance in dual-amp capacitor installs.
1. Using undersized power or ground wires - Leads to voltage drop, weak bass, and potential overheating.
2. Poor grounding - Can cause humming, whining, or ground loop issues.
3. Skipping fuse blocks - Increases the risk of shorts and electrical fire.
4. Mounting the capacitor too far from the amps - Reduces performance due to added resistance.
5. Failing to pre-charge the capacitor - Sends a surge through the main fuse that sparks at the terminals and can blow the fuse.
Pro-Level Wiring Tips for Two-Amp Builds
These tips earn their place once a dual-amp system climbs past about 1,500 watts RMS.
- Upgrade alternator or add second battery for extreme systems.
- Run RCA signal cables down the opposite side of the car from the power wire to keep alternator whine out of the signal.
- Label all connections.
- Keep wiring runs short for efficiency.
- Complete the Big 3 upgrade to reduce voltage drop and improve current flow.
FAQs About Wiring a Capacitor with Dual Amps
Can you run two amps off one capacitor?
Yes, as long as the capacitor is sized correctly and wired properly through a distribution block.
Is a capacitor better than a second battery?
Not exactly. A capacitor handles short power spikes, while a second battery provides long-term reserve power. Which one a system needs first depends on the charging system, as laid out in capacitor or battery for the next upgrade.
How do you size a capacitor for two amps?
Add up the total RMS wattage of both amps, then use at least 1 Farad per 1,000 watts.
Where should I mount the capacitor in a dual amp setup?
As close as possible to the amps or distribution block. Short wiring distances improve performance and reduce voltage loss.
Can I charge the capacitor directly from the battery?
Not directly. You must use a resistor or test light during charging to avoid a dangerous current spike that could damage electronics or spark heavily.
What happens if I use a capacitor that’s too small?
An undersized capacitor empties before a bass peak ends, so both amps see the dip anyway.
Wrapping Up
Compared with a single-amp install, how to wire a car audio capacitor with dual amps differs by one part, the fused distribution block, and asks for the same care with grounds and wire gauge.
For higher-powered setups, consider upgrading your capacitor or pairing it with a second battery to maintain consistent voltage under load.
Explore More