In many cases, car stereos tend to produce annoying humming noises after a few years of use. Mostly, it happens due to a ground loop or blown RCA ground wires. Whatever the reason is, you need to ground the RCA cables to get rid of that annoying sound coming from your stereo.
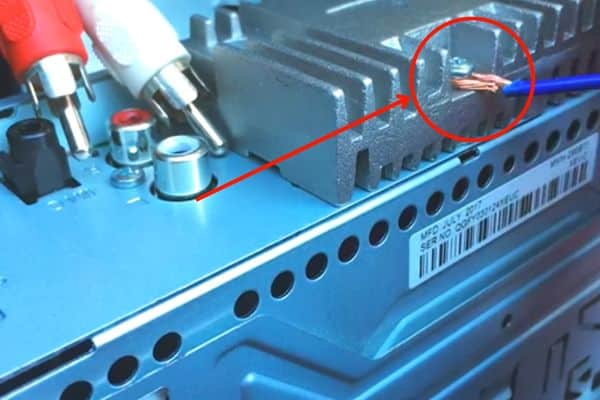
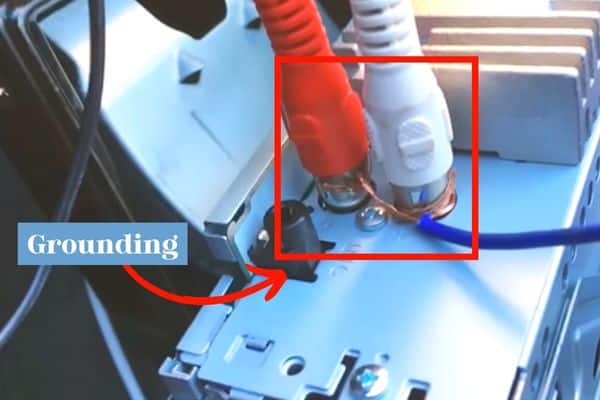
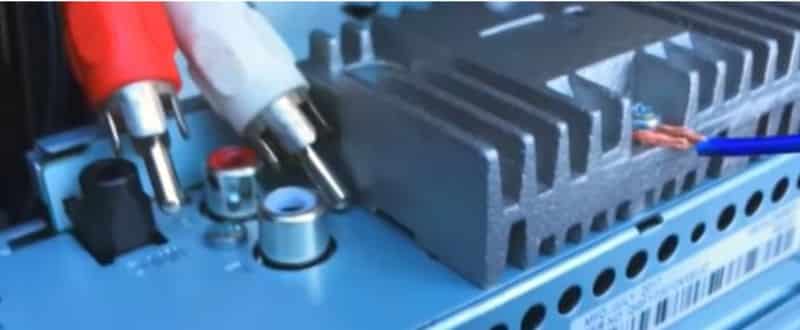
So, how to ground RCA cables to head unit? Well, the process is simple as all you need is to wrap a bare wire around the blown RCA cable's shield and route it towards your vehicle's head unit. After that, you can attach the other end of the bare wire to your head unit's chassis or case using a metal screw.
Although I covered the simple process here, you'll need a complete guide to successfully ground the RCA cables. So, without further ado, let's dig deeper.
In This Article
Do RCA Cables Need to Be Grounded?
Before you proceed, you should know whether your RCA cables really need grounding or not. Mostly, RCA cables are designed to be grounded and well-balanced. Each cable features two braided wires inside, one functioning as a signal carrier and the other one for grounding or electrostatic shielding.
However, sometimes the manufacturer might supply faulty cables without grounding. Or, the RCA cables might have blown or worn-out ground wires.
In this case, you must ground the RCA cables to the car's head unit to enjoy uninterrupted audio.
Luckily, you can easily check if your stereo's RCA cables need grounding.
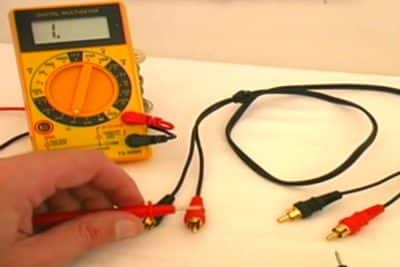
For this, use a multi-meter for checking the continuity of the RCA cables. A visual inspection of the cables and wires might reveal the issue as well.

Ground RCA To Head Unit - A Step-By-Step Guide
To ground your RCA cables, all you need is to connect a bare wire to the cable shield and your car's metal head unit. You'll need to follow some tips and tricks along the way to make a secure connection. Let's get directly into the process.
Step One: Gather Necessary Items
As I'm going with the easiest possible method, I have only included cheap and easily attainable tools to complete this task. For this method, you'll need a few regular tools and a bundle of wire of the right size.
Collect the following tools and proceed to the next step:
- At least one 18-gauge wire with proper insulation. The wire's length will depend on where you're placing the head unit and the cables
- Wire cutter and stripper
- Drill and drill bit
- One metal screw or grounding lug bolt (optional)
- Safety gloves
Step Two: Follow Required Safety Measures
First things first, wear your rubber safety gloves just to avoid the chances of getting shocks. Next, you need to separate your car stereo and head unit from the vehicle. This way, you can easily access the RCA cables and disconnect the devices from the power source.
Step Three: Prepare the Grounding Wire
As mentioned, the wire you'll be using should be thick and well-insulated.
So, use an 18-gauge wire and cut it off as needed using a wire cutter.
Take each end of the wire and strip off about 1/2-inch of the insulation with a wire stripper.
Twist the exposed wires together and the wire is ready for use.

Step Four: Connect the Exposed Wires
If you don't know which part of the RCA cables needs to be connected with the grounding wire, here's a small description. Take the RCA cable plug and you'll notice a rounded rim just beneath its tip.
The rim is called a cable shield and that's the part you need to cover with the grounding wire.
Wrap the cable shield with one end of the grounding wire. After that, you need to find a proper place on the metal head unit frame. Some stereos have a metal screw or metal plate for grounding.
Look for it and wrap it with the other end of the grounding wire.

Step Five: Drill a Metal Screw If Needed
If your car's head unit doesn't have any grounding screw or plate, you need to make a grounding spot with a drill. For this, choose a suitable metal screw or grounding lug bolt.
Select a suitable spot on the head unit to screw it. Use a proper drill bit that is slightly smaller than the screw or bolt tip.
Drill a hole into the head unit's metal frame. Make sure none of its inner components are hurt during the process. Place the screw on the hole and fit it snugly.
Finally, wrap the grounding wire around the newly placed metal screw or nut. I recommend asking for professional help for this step in case you don't have any previous experience working with the head unit.
Step Six: Test the Grounding
Once you're done, place the stereo and head unit back in place. Connect your speakers and turn on the stereo. If it delivers smooth audio without any humming noise, your job is done!
Final Words
There you have it all about how to ground RCA cables to head unit. Of course, you can follow any other grounding method if you want. But, here I have provided the easiest and safest way of grounding the RCA cables and eliminating unwanted noises.
So, follow the given instructions for the best audio experience from your car stereo.
Check-out Related Guide:

