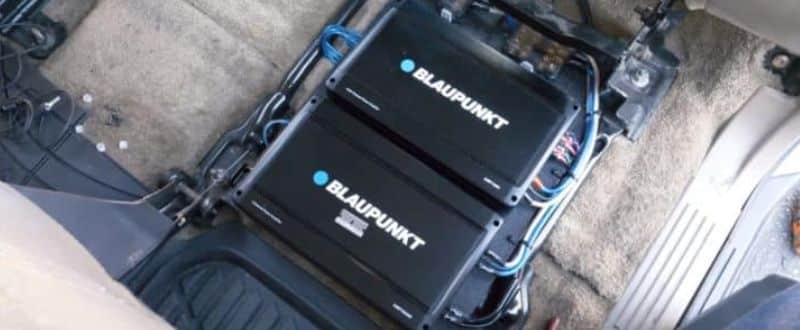
Is your car audio system lacking that powerful, immersive sound? A single amplifier may not be enough to handle all your subwoofers and speakers effectively. The solution? Learn how to install 2 car amp together and transform your car into a rolling concert hall.
Here I will provide everything you need, from calculating wire gauges to wiring two amplifiers seamlessly. Let’s get started!
In This Article
Why Install 2 Car Amplifiers?
Adding a second amplifier can:
- Boost power for high-performance subwoofers and speakers.
- Enhance sound quality by dedicating separate amps for bass and highs.
- Support more complex audio setups for audiophiles.
Installing 2 amps allows you to achieve the ultimate in-car audio experience, ensuring every beat and note is crisp, loud, and clear.
Calculating Wire Gauge for Two Amplifiers
Proper wiring ensures optimal power delivery to your amplifiers. Here’s how to calculate the required wire gauge:
Step 1: Determine Current Requirements
Using the formula, I = P/V [Current= I]; [Watt = P]; [Voltage=V] Calculate the total current draw of your amplifiers.
- Example: Two amps rated at 1200W and 800W, system voltage of 13V:
= (1200+800)/ 13 [the system voltage for the Car amplifier is 12 - 14.4]
~ 148 amps
Step 2: Account for Efficiency Loss
Amplifiers are typically 80% efficient. Adjust the current calculation:
I = 148/.80 [.8 because it’s 80% efficient]
= 185 amps
Step 3: Real-World Usage
Amplifiers consume about 50% of their max input current during normal operation:
185×0.5=92.5 amps
Step 4: Choose the Right Wire Gauge
For 92.5 amps over a 14.7-foot cable length, a 4-gauge power and ground cable is recommended. Consult an amplifier wire gauge chart for precise guidelines.
Essential Equipment for Dual Amplifier Installation
To install two car amplifiers together, you’ll need the following:

- Power and Ground Cables: 4-gauge wires to handle current efficiently.
- RCA Cables: Two high-quality cables for audio signal transfer.
- Remote Wire: To turn the amplifiers on/off.
- In-Line Fuse: Choose a fuse rated between 92.5-105 amps.
- Distribution Block: A 2-way block for splitting power and ground connections.
- Transmitter: Enhances weak remote signals to power both amplifiers.
- Speaker Wires: To connect speakers and subwoofers to the amps.
6 Steps to Install 2 car Amplifiers
After collecting all the kits for installation, now that you are ready to hook up with my six-step guide, let's go into the steps:

Step 1: Connecting with In-Line Fuse
First, disconnecting the negative terminal of the battery, you should mount the in-line fuse holder and the inline fuse near the battery. Split the power cable using a wire trim and connect one end with the in-line fuse. It's better to add a ring terminal on the other end of the power cable and connect it with the positive terminal of the battery.
Now, you must attach the remaining power cable with the output end of the in-line fuse and run the cable through the firewall grommet to the location where you have mounted the amplifiers.
Step 2: Connect the Distribution Block
You’ll require a distribution block to split the power for both amplifiers. After mounting the distribution block at the nearest location to amplifiers, connect each amplifier with a power cable from the distribution block.
Remember, the distribution block can distribute the power non-equally. So, ensure the maximum power output in the distribution block is connected to the high power-consuming amplifier. The lower one is connected to a low-power consuming amplifier between two amplifiers.
Step 3: Ground the Amplifiers
Just like power connections, use two (same gauge as power cable) ground cables from two amplifiers and then connect them to a distribution block. The output wire from the distribution block will be attached to the metal nut.
Step 4: RCA Connections
The conventional way to connect the RCA cables to two amplifiers is by pre-amp pass-through (output) connection. It means the first amplifier will have RCA input connection from the head unit. Now, you have to take another RCA cable from the same amplifier's RCA output and plug it into the next amplifier's RCA input.
In modern vehicles, the head unit has several preamp outputs for hooking up at least two amplifiers. In this case, connect the two RCA cables from the head unit to the amplifiers. Also, using the Y splitters help to connect two amplifiers with dead units by one RCA cable.
Step 5: Install the Transmitter
As there is only two amplifiers, most experts suggest having the remote lead connection through a series of wiring. It means you will run the remote wire from the head unit to the 1st amplifier and the 1st amplifier to 2nd amplifier.
But for high-end amplifiers, the series wiring can't turn on both amplifiers for the weaker signal of the head unit. That's where the transmitter helps, you have to attach the remote wire from the head unit with the transmitter and it will transmit strong signals to both the amplifiers.
Step 6: Connect the Speakers
Now, wire the amplifiers with speakers, subwoofers and tweeters. If you love bass, ensure powerful subwoofers are connected to the powerful amplifiers. Connect the positive speaker terminal to the positive amp terminal and do the same for negative terminals.
Step 7: Double-Check Connections
Finally, when all the wirings have completed, double-check them again using my above diagram. You can now connect the unattached negative terminal and power up the amps.
Conclusion
Learning how to install 2 car amp together opens the door to a truly exceptional car audio experience. By following my step by step guide, you’ll achieve a professional-grade setup that amplifies every beat and bass drop with precision.
Ready to transform your ride’s sound system? Share your experience in the comments below, and let’s rock the road together!
Related Guides You May Read:

