A good car stereo goes a long way to ensure your car is always fun to ride on. However, stereo systems are known to be susceptible and delicate parts on any car and are recommended to be checked regularly.
Now, a common question that bugs many people is, “how to power a car stereo with a battery charger?”
Well, the process is kind of straightforward as long as you follow the guidelines. Clipping the wires, connecting the alligator clips, and then attaching to the car battery can get your work done.
However, there are a few steps that you need to abide by to get your stereo powered with a battery charger. So, keep reading till the end.
In This Article
7 Steps To Power a Car Stereo With Battery Charger
Knowing how to use a battery charger for multiple purposes is recommended, especially if you have a car. So, here in this section, I have provided a step-by-step process of powering the stereo with a battery charger without any ifs and buts-
Step 1: Clipping the Wires Properly
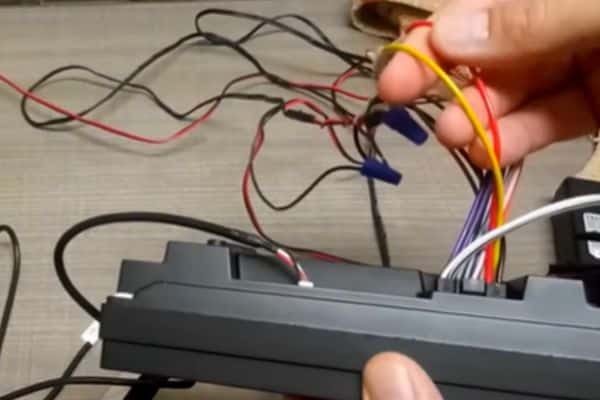
There are usually about 2 or 3 wires coming out of a stereo when you have pulled it out enough from the dash. And it’s essential to know which wire connects with which and what their powers are.
A red, yellow, and black wire should be present at the back of the stereo. The red and the yellow wires are positive volts or DC inputs, while the black wire has negative input.
Separate the yellow and the red wires and put them further away from the black ones.
Using a crimping tool, take the yellow wire first and cut off about half an inch of the wire's insulation.
After that, grab the red wire and repeat the same process with it too. When both wires have been crimped, twist the wired ends of both wires together.

Step 2: Connect the Alligator Clips
Now, grab your alligator clips when you have the yellow and red wires crimped together. Always remember that you work in a place far away from any water source, as it could result in a short circuit.
Moreover, it’s also crucial to remember the color coordination of the wires for safety measures. The red alligator clip goes with the red and yellow wires, while the black alligator clip goes with the black wire.
Grab the yellow and red crimped wires and place them safely yet distant from the red alligator clip.
Connect the red alligator clip to the red and yellow wires and the black alligator clip to the black wires.
Experts’ Tip: While doing so, it is essential to ensure the battery's power is always cut off throughout the process.
Step 3: Attaching to the Battery Charger
Ensure the alligator clips are appropriately connected to each of the wires and grab the battery charger. So, when you are ready, grab the red and yellow intertwined wires and connect them to the positive input of the battery charger.
Then take hold of your black negative wire and connect it to the negative input of the battery.
While doing so, avoid allowing wires to come in contact with other wires to prevent short circuits.
Here’s an extra precautionary measure for you. Use an electrical wire and cap the ends of each of the wires. This will prevent any contact between each wire and ensure safety.

Step 4: Check the Voltage
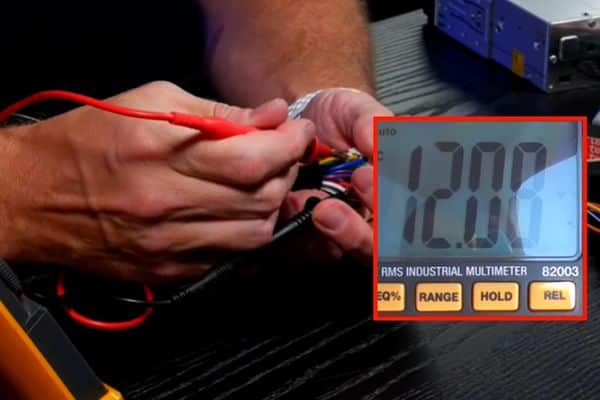
Car stereos usually start working when they receive 12 volts of power supply. You can also use a multimeter to measure the voltage to ensure your stereo receives the maximum and ideal power.
Turn the DC voltage switch on the multimeter and connect the wires as needed. The red or the positive wires connect to the red or the positive leads. Meanwhile, the black or negative wire connects to the black or negative lead.
If the battery supplies power and the voltage reading is positive, the wire in contact with the red or the positive lead on the multimeter is positive. Meanwhile, the wire connected to the black lead on the multimeter is negative.

Step 5: Power the Stereo On
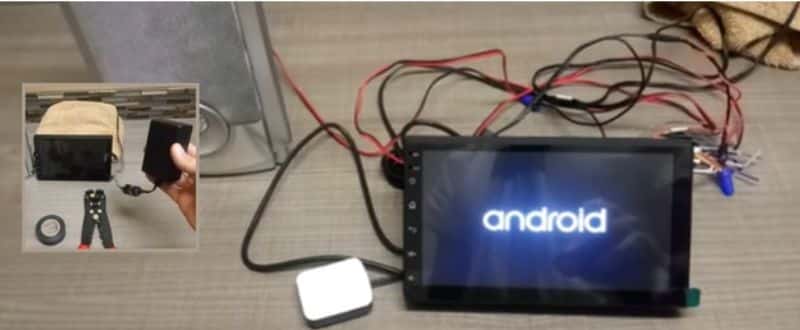
Now that you have got the readings from the multimeter, you can crank up the stereo. Begin very low and slow, and allow the stereo to power up.
When the stereo is on, very slowly, turn the volume up and check the quality of the speaker. Try multiple different songs and radio stations to ensure the stereo is, in fact, properly functioning.

Step 6: Give a Final Check
After you have checked the stereo, give it a few minutes to rest and turn it off. Let it remain powered off for 10 to 15 minutes before powering it up again. Or you can also touch the stereo system and ensure it is not heated and has cooled down completely.
After a few minutes, turn the stereo on using the battery charger. Take your time and crank up the volume to recheck the speakers.
Bottom Line
A car stereo is essential in making your car rides feel joyous and fun. This is why keeping up with its maintenance is vital. So, after going through this blog, you should now have a clear idea to power a car stereo with a battery charger.
Relevant Blog Links:

