Want to know how to test a car subwoofer, right? With my three convenient methods, you can quickly test your subwoofer flawlessly. My first method is about to test your subwoofer with a multimeter. Later, I will show you how to test your car subwoofer using an amplifier or a battery. Without further ado, let's get into the first method.
In This Article
Method 1: Testing a Car Subwoofer with a Multimeter
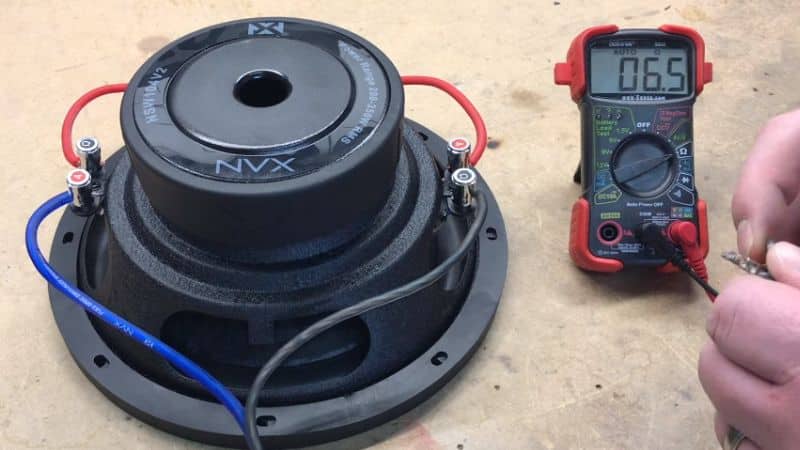
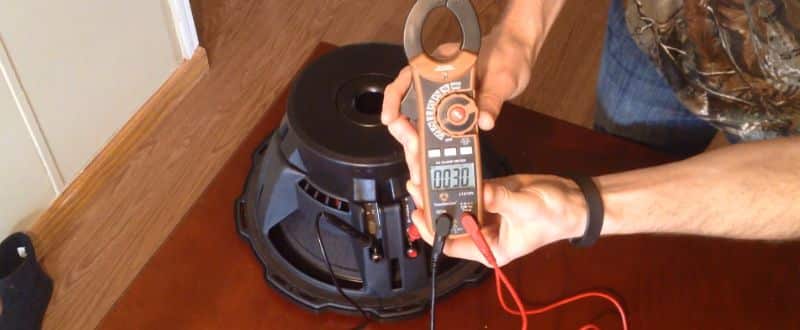
Using a multimeter is one of the most reliable ways of testing a car subwoofer. This method helps determine whether the voice coil is functioning properly by measuring its electrical resistance. A faulty subwoofer may show signs of an open or shorted coil, which can affect sound quality or prevent it from working entirely.
By following the steps below, you can quickly diagnose your subwoofer's condition and identify potential issues before they escalate. Let’s begin!

Step 1: Set the Multimeter to Resistance Mode
Start with setting your multimeter to the resistance (ohm, Ω) setting. It is usually indicated by the Greek letter omega (Ω). If your multimeter has multiple resistance settings, choose one that can measure up to a few tens of ohms.
Step 2: Disconnect the Subwoofer from Power
Ensure the subwoofer is completely disconnected from the power source and the audio system. This is important to prevent electrical damage to the subwoofer or the multimeter.
Step 3: Locate the Subwoofer Terminals
Identify the subwoofer's positive (+) and negative (-) terminals. These are typically marked and can be found where the speaker wire connects to the subwoofer.
Step 4: Connect the Multimeter Probes
Attach the multimeter's red probe to the positive terminal and the black probe to the negative terminal. Ensure the connections are secure and that the probes are making good contact with the metal parts of the terminals.
Step 5: Observe the Multimeter Reading
A functioning subwoofer should display a resistance close to the value specified by the manufacturer, usually within 10% of the nominal impedance (e.g., 4 ohms or 8 ohms).
Common readings include:
- 4 ohms: Common for many car subwoofers.
- 8 ohms: Less common in car audio but prevalent in home audio equipment.
Step 6: Analyze the Results
- Normal Reading: Close to the subwoofer’s rated impedance → The voice coil is in good condition.
- High or Infinite Resistance: Possible open circuit in the voice coil.
- Low Resistance: Possible shorted coil.
Using a multimeter to test your car subwoofer is a quick and effective way to check its health and functionality. This method can help troubleshoot issues before they lead to more significant audio system problems.
Method 2: Testing Car Subwoofer with an Amp
Testing a subwoofer with an amplifier allows you to check its sound output and detect potential issues like distortion, weak bass, or connectivity problems. This method helps verify whether the subwoofer is receiving power and producing clear, undistorted sound at different volume levels.
By following the steps below, you can ensure your subwoofer is properly connected and functioning as expected. Let’s get started!

Step 1: Ensure Proper Connections
Before you begin, make sure the subwoofer is disconnected from any power sources. Check for insecure or incorrect connections between the subwoofer and amplifier. Double-check all connections to avoid misunderstandings.
Step 2: Reconnect the Power and Select a Sound Source
Reconnect the power to your amplifier and choose a sound source (e.g., audio CD, Bluetooth, USB, or radio).
Step 3: Test the Subwoofer at Low Volume
Start with a low volume and gradually increase it. Listen for a clear bass sound without distortion as the volume rises.
Step 4: Troubleshoot Common Issues
- No Bass or Faint Sound: Check all connections and try again.
- Distortion or Poor Sound Quality: Your subwoofer may have an internal issue.
Step 5: Lower the Volume and Disconnect
After testing, reduce the volume before disconnecting the system to prevent sudden power surges. Using an amplifier helps diagnose issues related to sound distortion or wiring problems efficiently.
Method 3: Testing Car Subwoofer with a Battery
Using a battery is a quick and simple way to check if a subwoofer’s voice coil and mechanical components are functioning properly. This method involves briefly connecting a small battery to the subwoofer terminals to observe cone movement. If the subwoofer responds as expected, it confirms that the electrical circuit is intact.
Follow the steps below to safely and effectively test your subwoofer using a battery. Let’s begin!

Step 1: Disconnect the Subwoofer from Power
Completely disconnect the subwoofer from its power source and the audio system. This prevents potential electrical shock or system damage.
Step 2: Identify the Subwoofer Terminals
Locate the subwoofer's positive (+) and negative (-) terminals. These are typically where the speaker wires connect to the subwoofer and are often marked with plus and minus symbols or color-coded (red for positive and black for negative).
Step 3: Use a Fully Charged Battery
Ensure that the 9-volt battery is fully charged. A weak battery may not provide sufficient power to move the subwoofer cone. If you don’t have a 9-volt battery, you may use a 12-volt battery, as both will give you the same results.
Step 4: Briefly Connect the Battery to the Subwoofer
Touch the battery terminals to the corresponding terminals on the subwoofer—positive to positive and negative to negative. It’s important to make this contact brief (just a second or two) to avoid damaging the subwoofer.
Step 5: Observe the Subwoofer Cone Movement
- Expected Movement: The cone moves outward when connected and returns when disconnected. This indicates the subwoofer is receiving power and functioning properly.
- Reverse Test (Optional): Briefly reversing the connections should cause the cone to move inward, confirming responsiveness.
Step 6: Analyze the Results
- Positive Result: The cone moves as expected without scraping sounds → The subwoofer is in good working condition.
- Negative Result: No movement or unusual noises → Possible issues with the voice coil or mechanical components.
Using a battery to test a car subwoofer is an effective and straightforward method for quickly checking its basic functionality. This test is particularly useful when you want to ensure that a subwoofer is operational before installing it or troubleshooting other elements of your car's audio system.
Final Verdict
All the 3 methods I mentioned above offer a practical way to test your subwoofer's functionality. Start with the simplest tests like visual inspection and cone push test, and then use more specific methods like testing with a multimeter, an amplifier, or a battery.
These tests can help you ensure that your subwoofer is in good working condition or identify if there are issues that need further professional assessment. For any testing, always ensure safety by disconnecting the subwoofer from power sources and handling the equipment gently.
Related Guides You May Read:

